
GNU Screen is a free virtual terminal multiplexer that allows a user to access multiple separate terminal sessions inside a single terminal window or remote terminal session.
Persistence
Similar to VNC, GNU Screen allows the user to start applications from one computer, and then reconnect from a different computer and continue using the same application without having to restart it. This makes migration between locations like work and home simple. Screen provides terminal-agnostic functionality so that users can disconnect and reconnect using different terminal types, allowing applications to continue running without being aware of the change in terminals.
Multiple windows
Multiple terminal sessions can be created, each of which usually runs a single application. The windows are numbered, and the user can use the keyboard to switch between them. Some GUI terminal emulators provide tabs or otherwise similar functionality to this. Each window has its own scroll-back buffer, so that output is captured even when the window isn't actively displayed, and that history can be saved even when migrating to another computer. Windows can be split-screened. While some text applications have this functionality built in, Screen allows any application to be split-screened alongside any number of other applications.
Session Sharing
Screen allows multiple computers to connect to the same session at once, allowing collaboration between multiple users. The same computer can also be used to make multiple simultaneous connections, providing alternative functionality to screen-splitting, particularly for computers with multiple monitors.
This is very useful for developers and people who work remotely.
A screenrc file determines the look, feel and actions and keybindings of the 'screen'.
Below is the how to setup screen in linux (ubuntu, debian).
Install screen
here is my screenrc, put it into your screenrc.
Open /etc/screenrc and delete the contents and insert the below lines:
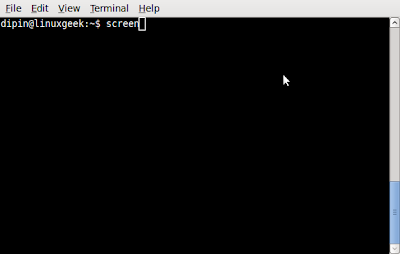
1. start screen
 2.
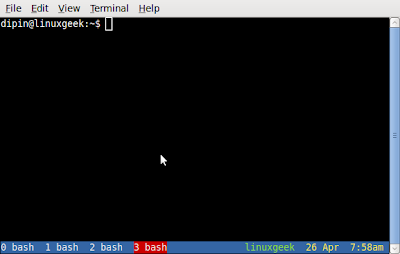
2. 3. Create extra terminals:
Type " Ctrl+z then press c " to create new shell
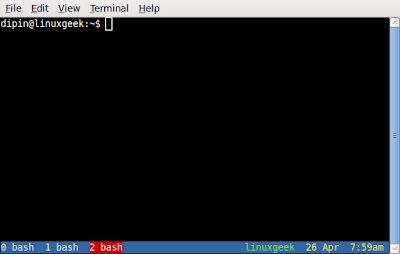
4. Close a shell:
Type " Ctrl+d " to close a shell.
 5. name your shell
Type " Ctrl+z then Shift+a " to name or rename your shell
 6. navigation
" Ctrl+z then { " now use up & down arrow to scroll on the shell, press Esc to exit mode.
Enjoy using terminal.
Please comment to clarify doubts or need to know any key bindings.
Thanks!
Similar to VNC, GNU Screen allows the user to start applications from one computer, and then reconnect from a different computer and continue using the same application without having to restart it. This makes migration between locations like work and home simple. Screen provides terminal-agnostic functionality so that users can disconnect and reconnect using different terminal types, allowing applications to continue running without being aware of the change in terminals.
Multiple windows
Multiple terminal sessions can be created, each of which usually runs a single application. The windows are numbered, and the user can use the keyboard to switch between them. Some GUI terminal emulators provide tabs or otherwise similar functionality to this. Each window has its own scroll-back buffer, so that output is captured even when the window isn't actively displayed, and that history can be saved even when migrating to another computer. Windows can be split-screened. While some text applications have this functionality built in, Screen allows any application to be split-screened alongside any number of other applications.
Session Sharing
Screen allows multiple computers to connect to the same session at once, allowing collaboration between multiple users. The same computer can also be used to make multiple simultaneous connections, providing alternative functionality to screen-splitting, particularly for computers with multiple monitors.
This is very useful for developers and people who work remotely.
A screenrc file determines the look, feel and actions and keybindings of the 'screen'.
Below is the how to setup screen in linux (ubuntu, debian).
Install screen
$ sudo apt-get install screenThe default look of the screened terminal is unacceptable.here is my screenrc, put it into your screenrc.
Open /etc/screenrc and delete the contents and insert the below lines:
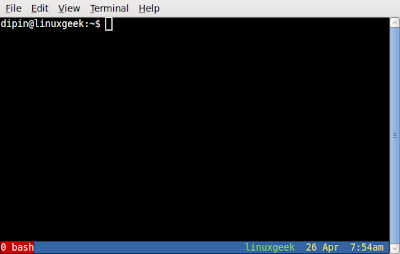
startup_message offBelow are some how to use and screen shots:
deflogin on
vbell_msg " Wuff ---- Wuff!! "
defscrollback 1024
bind ^k
bind ^\
bind \\ quit
bind K kill
bind I login on
bind O login off
bind } history
termcapinfo vt100 dl=5\E[M
hardstatus on
termcapinfo xterm*|rxvt*|kterm*|Eterm* hs:ts=\E]0;:fs=\007:ds=\E]0;\007
hardstatus alwayslastline
hardstatus string "%{.bW}%-w%{.rW}%n %t%{-}%+w %=%{..G} %H %{..Y} %d %M %C%a "
termcapinfo xterm*|linux*|rxvt*|Eterm* OP
termcapinfo xterm 'is=\E[r\E[m\E[2J\E[H\E[?7h\E[?1;4;6l'
#altscreen on
escape ^za
1. start screen
 2.
2. 3. Create extra terminals:
Type " Ctrl+z then press c " to create new shell

4. Close a shell:
Type " Ctrl+d " to close a shell.
 5. name your shell
Type " Ctrl+z then Shift+a " to name or rename your shell
 6. navigation
" Ctrl+z then n " to move to next shell7. Scroll
" Ctrl+z then p " to move to previous shell
" Ctrl+z then z " to toggle between two shells
" Ctrl+z then shellnumber " jumps to the shell shellnumber
" Ctrl+z then { " now use up & down arrow to scroll on the shell, press Esc to exit mode.
Enjoy using terminal.
Please comment to clarify doubts or need to know any key bindings.
Thanks!
Comments