
Most of us run multiple Operating Systems on our PC's and are connected to LAN with machines running different Operating Systems. Now, Linux even though is sort of immune to viruses (there are few viruses, and Linux can get infected ) most of Desktop Linux users don't need Anti virus tool, but there are people who run Windows and there are umpteen number of Viruses, Worms and Trojans for Windows and removing them can be difficult.
Running Antivirus tool on Linux can be especially helpful in such cases , searching and removing viruses from a different Operating System would definitely help speed up the process and prevent Viruses from interfering with AntiVirus's scan process, also for PC's connected to LAN, Anti virus for Linux could detect any virus laden file transfer prompting one to take appropriate action and prevent virus from spreading to other PC's on the LAN.
There are couple of AntiVirus tool available on Linux, and in this article I would look into AVG Free Antivirus, which is one of the most user friendly of the Lot and offers a simple , intuitive interface.
Installing AVG Free Antivirus on Ubuntu
AVG provides a debian package along with packages for other distributions that you can download from this site , Or if you are on Ubuntu you can issue the following command in the Terminal (Application -> Accessories -> Terminal ) window to install AVG Free Antivirus.
Finally , Once you have install AVG Free launch it's GUI Frontend from (Applications -> Accessories -> AVG for Linux Workstation ).
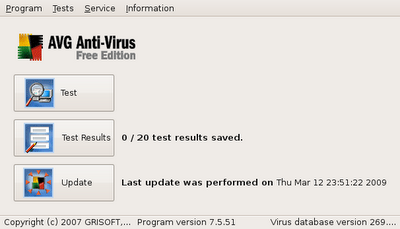 AVG Antivirus Linux Frontend
The AVG Free version that you have downloaded and installed contains Old Virus definitions and needs to be updated which you can easily do by clicking on the Update button.
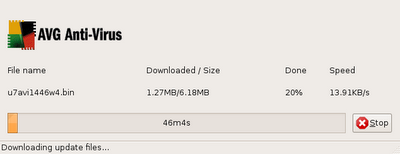 AVG Antivirus Updating itself
Now, once AVG has updated itself you can start scanning your drive for Viruses. You might though like to configure few of AVG Antivirus settings which you can do easily from (Service -> Program Settings ).
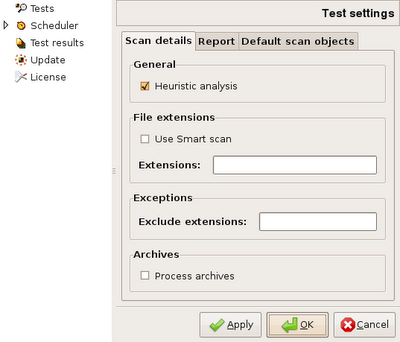 Different AVG Antivirus settings
To scan click on the Test button and select the folder/drive you want to scan. However , one thing I disliked about AVG Free anti virus was that it does not offer any option to remove scanned Viruses ( You would have to buy a commercial version of the AVG to enable removing of viruses). You would either have to go to the path and delete the infected file yourself or use some other Virus scanner on Windows to remove viruses. I looked into the manual for options to enable removing viruses or at least quarantining infected file and found we could do by modifying configuration file , I tried on my system but it sadly did not work.
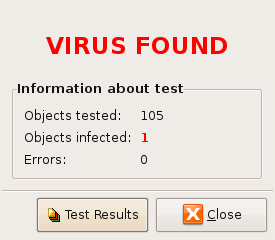
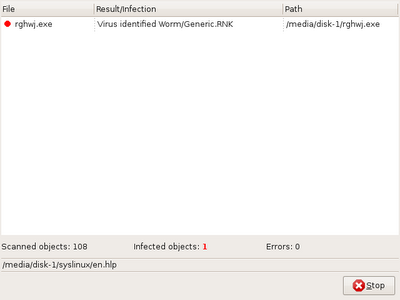
Scanning for viruses , and final test result.
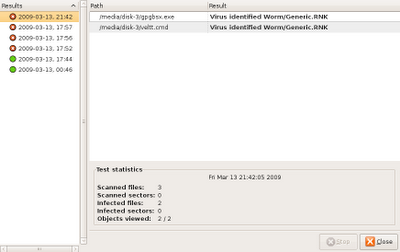
The Test result of Virus scan are stored with names of virus , date/time and location where virus was found stored in the database. The Test Result can be accessed by clicking on Test Result button in the front end of AVG.
Virus Scan test result archive
Conclusion : Antivirus on Linux is not essential, still it is useful addition to your desktop arsenal especially if you are computer is part of a network with Windows computers. AVG Free though is limited with its lack of ability to disinfect virus laden files, still AVG Free is one of the most user friendly Antivirus solution available on the Linux platform.
I found this article here
Running Antivirus tool on Linux can be especially helpful in such cases , searching and removing viruses from a different Operating System would definitely help speed up the process and prevent Viruses from interfering with AntiVirus's scan process, also for PC's connected to LAN, Anti virus for Linux could detect any virus laden file transfer prompting one to take appropriate action and prevent virus from spreading to other PC's on the LAN.
There are couple of AntiVirus tool available on Linux, and in this article I would look into AVG Free Antivirus, which is one of the most user friendly of the Lot and offers a simple , intuitive interface.
Installing AVG Free Antivirus on Ubuntu
AVG provides a debian package along with packages for other distributions that you can download from this site , Or if you are on Ubuntu you can issue the following command in the Terminal (Application -> Accessories -> Terminal ) window to install AVG Free Antivirus.
$ wget http://www.avg.com/filedir/inst/avg75fld-r51-a1243.i386.deb
and
$ sudo dpkg -i avg75fld-r51-a1243.i386.deb
Finally , Once you have install AVG Free launch it's GUI Frontend from (Applications -> Accessories -> AVG for Linux Workstation ).
 AVG Antivirus Linux Frontend
The AVG Free version that you have downloaded and installed contains Old Virus definitions and needs to be updated which you can easily do by clicking on the Update button.
 AVG Antivirus Updating itself
Now, once AVG has updated itself you can start scanning your drive for Viruses. You might though like to configure few of AVG Antivirus settings which you can do easily from (Service -> Program Settings ).
 Different AVG Antivirus settings
To scan click on the Test button and select the folder/drive you want to scan. However , one thing I disliked about AVG Free anti virus was that it does not offer any option to remove scanned Viruses ( You would have to buy a commercial version of the AVG to enable removing of viruses). You would either have to go to the path and delete the infected file yourself or use some other Virus scanner on Windows to remove viruses. I looked into the manual for options to enable removing viruses or at least quarantining infected file and found we could do by modifying configuration file , I tried on my system but it sadly did not work.


Scanning for viruses , and final test result.
The Test result of Virus scan are stored with names of virus , date/time and location where virus was found stored in the database. The Test Result can be accessed by clicking on Test Result button in the front end of AVG.

Virus Scan test result archive
Conclusion : Antivirus on Linux is not essential, still it is useful addition to your desktop arsenal especially if you are computer is part of a network with Windows computers. AVG Free though is limited with its lack of ability to disinfect virus laden files, still AVG Free is one of the most user friendly Antivirus solution available on the Linux platform.
I found this article here
Comments